= Hard Surface=
p.2
Panel Loops

Perspective OFF
apply to mesh <1mil polyg
= making a mech suit=
1/ Make a new PG ( each PG is gonna be its own panel) -> use Lasso selection /or/ Edge Loop seth Select Lasso for clean selection
2/ duplicate a model ( you will be building panels offf from one of these)
Brush-> Auto Masking-> mask by PG , put it to 100 ( it will prevent you from going to other PG)
3/ Hide the PG of the rest of the body you don't need
4/ Tool-> Geometry -> Panel Loops ( makes PG into its own Shell)
CTRL + SHIFT + A - to show the whole shell (all)
+ S - to Shrink
+ X - to expand
Double
- off - the panel is still connected to the body ( it just makes the lines)
- off - the panel is still connected to the body ( it just makes the lines)
- on - makes it own shell
 *Every mesh has Initialize stage
 Look at the Profile of thickness.
Use Move Topological brush with Panels- it will affect a Mesh at a time.
Elevation
- how far the Panel will sit on the surface. -100 - the whole panel goes inside of the existing silhouette. 0- the panel will sit half-above, half- under the surfae. +100 - it all sits on top.
Inner
- This mode creates the Panel Loop inside the model rather than outside. The difference between Inner and a negative Elevation setting (see below) is in the direction of the beveled edge shape relative to the original surface.


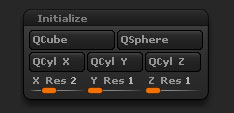 *Every mesh has Initialize stage
Quick Mesh primitives are based on the selected X, Y and Z values. Changing these settings will have an impact on the shape.
 Look at the Profile of thickness.
The Bevel Profile curve defines the shape of the bevel between the inside and outside surfaces of the panel. The left of the curve represents where the bevel connects to the surface (outer portion of the mesh) while the right of the curve is the bevel’s outermost edge. (Inner portion of the mesh) The height of the curve then defines the shape along that length. If the curve does not reach past the middle point of the curve editor, you will have some empty space between any panels that are adjacent to each other. Once any dot is placed past the halfway point of the grid (the fourth square) the bevels will begin to overlap and appear as if they are connected.
To add a point to the graph, click on it.To make it sharp, click on the dot, drag it out of the graph and back again. Do the same to go back to the curvature mode.
Make sure there is enough loops to support your Profile. ( This graph is connected with the Loops Slider). Look at how many segments your profile has, this is how many Loops you need.
Use Move Topological brush with Panels- it will affect a Mesh at a time.
Elevation
- how far the Panel will sit on the surface. -100 - the whole panel goes inside of the existing silhouette. 0- the panel will sit half-above, half- under the surfae. +100 - it all sits on top.
Inner
- This mode creates the Panel Loop inside the model rather than outside. The difference between Inner and a negative Elevation setting (see below) is in the direction of the beveled edge shape relative to the original surface.
Polish
- applies a polish effect on the resulting mesh — especially to the border of the PolyGroups — to create clean edges. Polish has two different options and you can switch between them by clicking on the small dot at the top right of the slider. - With the dot open the polish will reduce the smoothing of the original surfaces but may create some overlapping polygons at the bevel location. These can eventually be smoothed with Polish by Feature. This option can produce sharp points where three or more PolyGroups intersect.
- If the dot is closed ZBrush will round all PolyGoup borders.
Topology Brush
is:
= symmetrical=
=super low on polygons=
keep brush draw size below 30
B + T + O

It is important that the model doesn’t have subdivision levels.
This new brush basically draws curves on the model and snaps them to the surface. Draw intersecting lines, that form a quad - if ZBrush detects an intersection it will display a green circle to indicate this.
ALT + draw over an existing line to delete it
ALT + draw a curve somewhere else, that wouldn't intersect with anything =it will clean all " free floating" / unoccupied segments.
Go to the end of the cure and start drawing from the anding point to extend it.
Brush -> Curve-> Smooth - to have a smoother curve. (press 6 key).
Tap on the surface to create mesh. Half of it is Always inside and half- outside ( you can not tweak it like with panel loops).
*TIP
Since the brush works symmetrically, in case you need to cover the center of the model - start drawing out the curve from inside out. In the center dots meet. //OR use Mirror and Weld
Thickness of the Mesh is connected with the Draw Size of the Brush
With the new Mesh you get 3 Polygroups.
You can Play with it:
-> Transpose tool+ Ctrl + click on a PG to mask it
-> Move with the Transpose tool ( draw the Tool u and move the not masked areas)
-> * use Clip Brush ( To Straighten up the way an edge goes-> mask both ends of the PG, leaving unmasked only the edge you want to straighten. Draw a 90 degree clip brush to affect the edge) . You can clip area you need to be flat or have a certain curvature. You can do it as the mesh is so low on polygon count!
You can make a hole with it. Having all edges creased, you can "smooth it". With the ZModeller you can add an edge loop to help an ugly smooth. If you want to add an edge loop on both sides of the hole and make it the same,use a Slise Brush.
To make perfect straight lines, go to Stroke-> Curve-> As Line
ZModeler Brush
B+ Z+ M
gower over an edge + click SPACE - you will get all these ZModeller options:
Pick - Crease - - Edge- - now every edge you will click will get a crease. Tap with ALT to increase it.
*As there are no edges as sharp as the Crease gives you ( super sharp 90 degrees), people used to have edges they needed to keep sharp creased for first couple levels of subdiv, then uncrease it and subdivide some more- so it smoothes the edge a little( or instead of the crease ppl turned off Smt option- the smooth for first couple levels and furn that on for last several subdiv).
With the ZModeller you can insert an Edge loop and therefore control how round the edge is. (* the closer the edge loop is to the edge, the straighter/ sharper it will get).
Dynamic Subdiv
The Dynamic Subdivision system contains alternative functions to ZBrush’s Classic Subdivision Surface mode, allowing you to apply dynamic smoothing to your models without actually dividing the polygons. This feature is mainly designed to work in association with the ZModeler brush and low polygonal models.
The main difference between the two systems is simple: Dynamic Subdivision mode is used to represent the result of a smoothing your base mesh, letting you see what the divided model would look like even while you actually edit and sculpt the lower resolution mesh.While working with Dynamic Subdivision active, you see the higher resolution surface while your brushes operate on the lower resolution base mesh.

As with the classic Subdivision system, Dynamic Subdivision surfaces can be altered with creased edges. However, this new mode also offers a wide range of other options that drastically change the visual results of smoothing: chamfered edges, non-smoothed subdivisions and more.
D - turns on the dynamic subdiv
Shift + D - turns it off
You can see how creasing effects the model in real time.
* Crease-> Creasing Level f.e. at 2 - means that it holds creasing for 2 Levels and at like level 3/4/5 will do the smoothing.
With ZModeler you can add a constant bel to all edges and then you can preview it in the Dynemic mode.


ZSphere Topology


= recreate the same shape but really Low on Topology=
=have a symmetry on=
=set a Draw Size to 1 =
* Get a shape that you want ( *a lot of polygons)
1. Get a ZSphere
2. Rigging-> Select Mesh ( the mesh you want to retopology)
3. Edit Topology in Rigging
4. Click on Points where you want the vertexes to be
Orang Lines= a face
When you finish your forth click making a face, it shoots the active point to the previous dot (the 3rd one). The red circle is a sign of an active point, that you will keep drawing from.
To Deselect - double tap on Doc . Only after that tap on a point to select it.
OR///
SHIFT + tap on the point to reselect
Alt - to delete
A - preview adaptive skin
Adaptive skin , set to 1 to preview the first Level.
Make Adaptive skin - to make it a mesh.
+ use a Clip Brush - to straighten some areas
+ ZModeller -* to delete some edges / -*to slide some edges etc
+ Crease edges ...etc
Look up Ben Selwy
He Strarts with dynamesh and moves on to rebuild it with Topology br.


